
How to run BigQuery SQL using Jupyter notebooks in GCP?
Contents
Jupyter notebook in GCP
The Jupyter notebook is an open-source web application that allows us to create and share documents. It contains live code, equations, visualizations, and narrative text. It uses include data cleaning and transformation, numerical simulation, statistical modeling, data visualization, machine learning, and much more.
In GCP, we can create Jupyter notebook using Vertex AI service. It can be customized in terms of resources and environments.
Set up Jupyter notebook in GCP
- First enable BigQuery API and Notebooks API
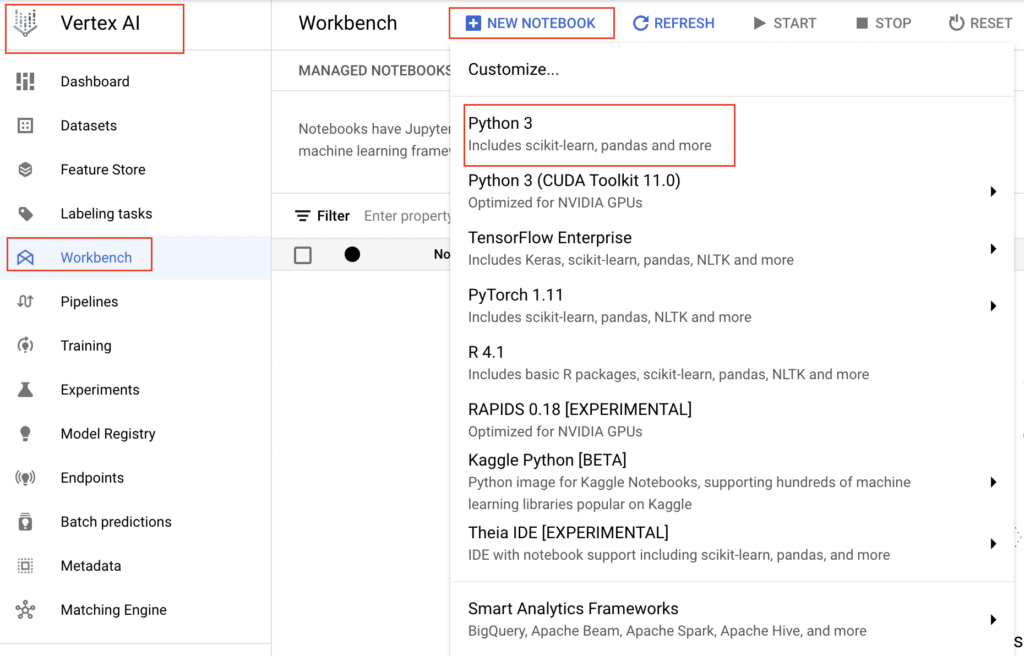
- Next go to Artificial Intelligence section in GCP console and select Vertex AI -> Workbench

- Now select New Notebook to view the list of available options. For this tutorial, we are selecting Python 3 notebook instance to run BigQuery SQL.
- In the pop up window, we need to provide the Notebook name and select the region and zone.
- If we are satisfied with the predefined Notebook properties, we can just click the create button.
- Otherwise we need to click Advanced options to change the properties of notebook instance.

- We have selected the Advanced options to change few properties and clicked Create button. As shown below, notebook instance is created successfully.
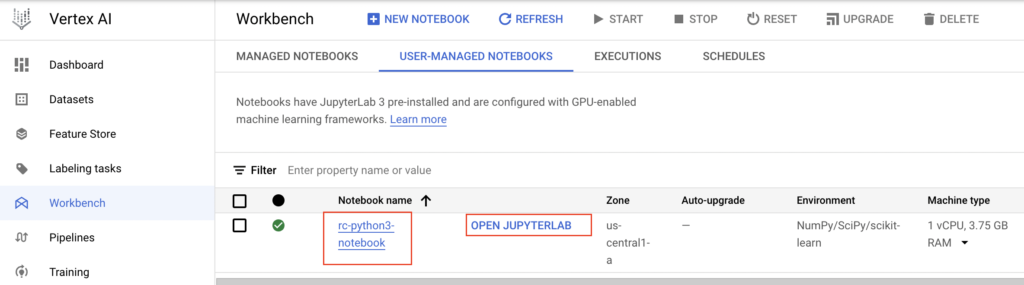
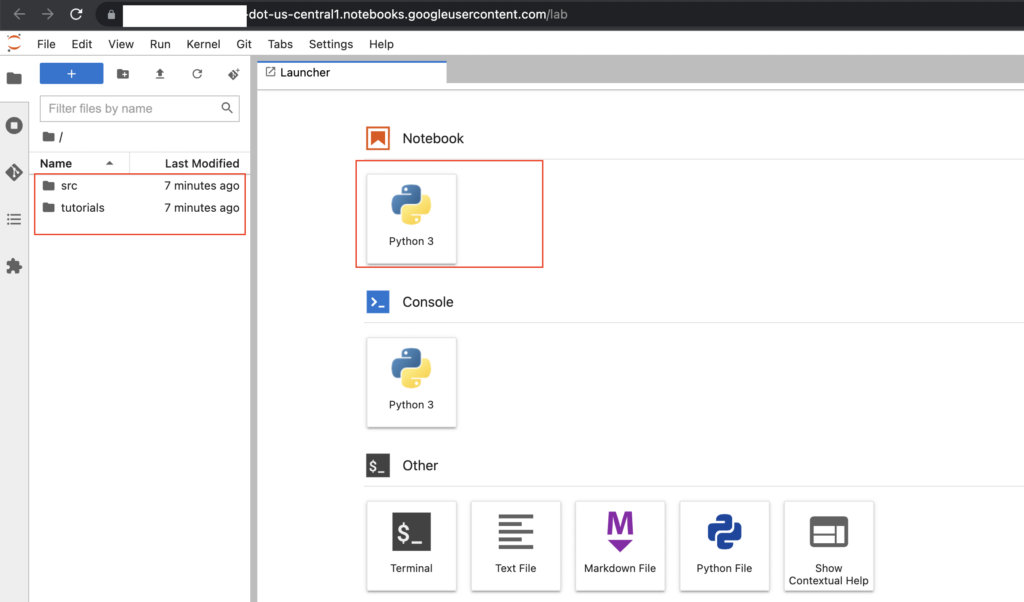
- We have clicked the OPEN JUPYTERLAB button and it opened the notebook as below.
Set up Github for notebook in GCP
Let’s set up Github repo for the notebook. If we don’t want to push the notebook changes to Github, we can ignore these steps.
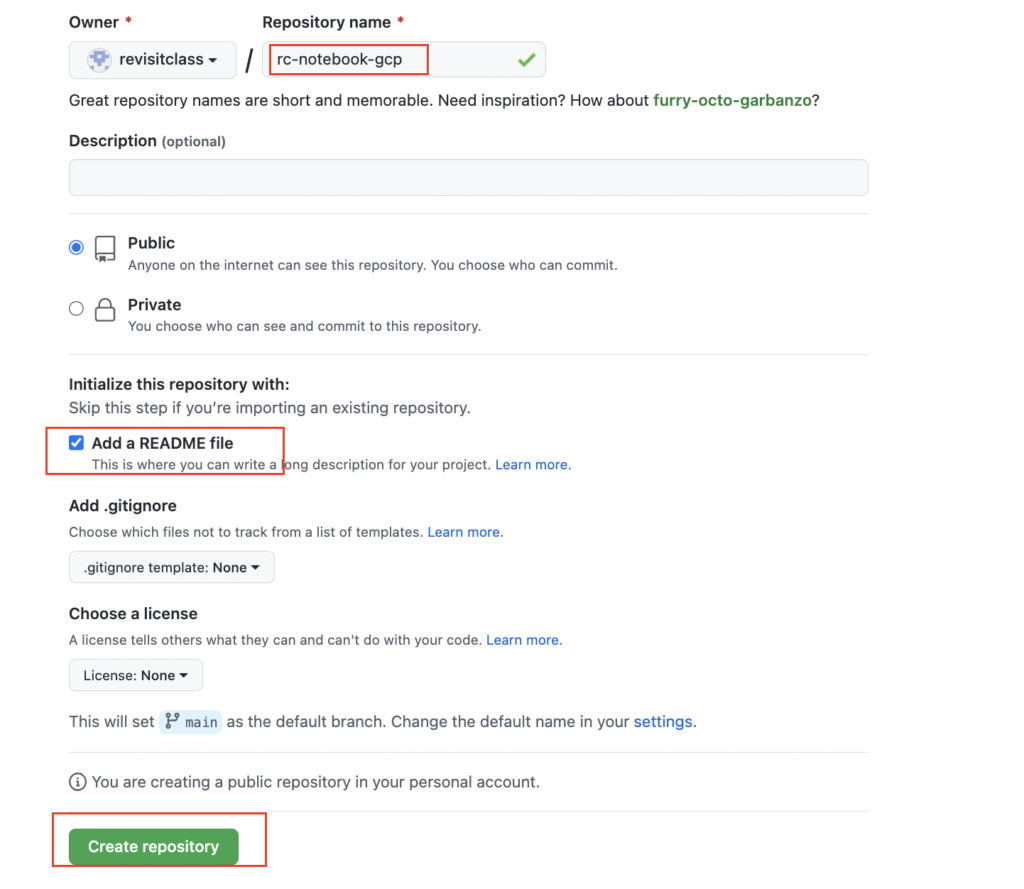
- First we logged into github.com and clicked Create repository button to create new repository for GCP notebook.
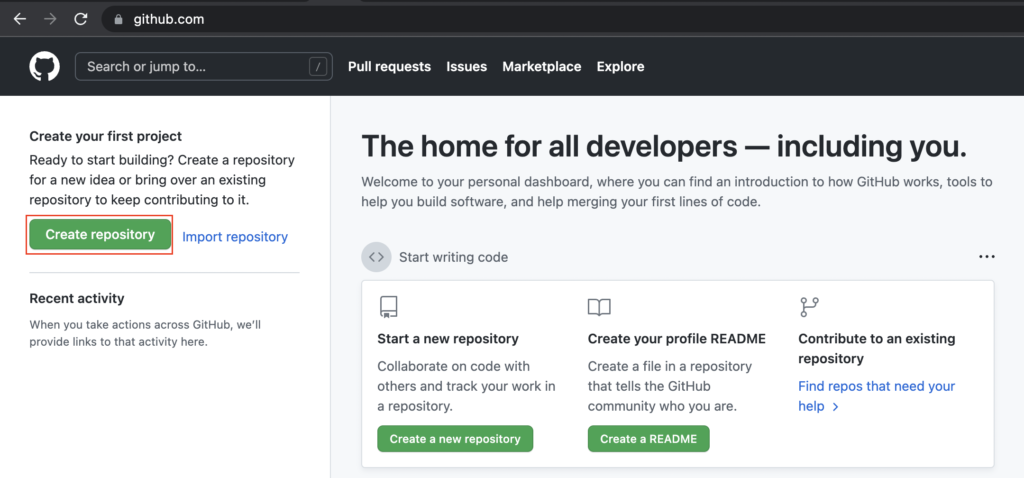
- Created the new repository with the name as rc-notebook-gcp
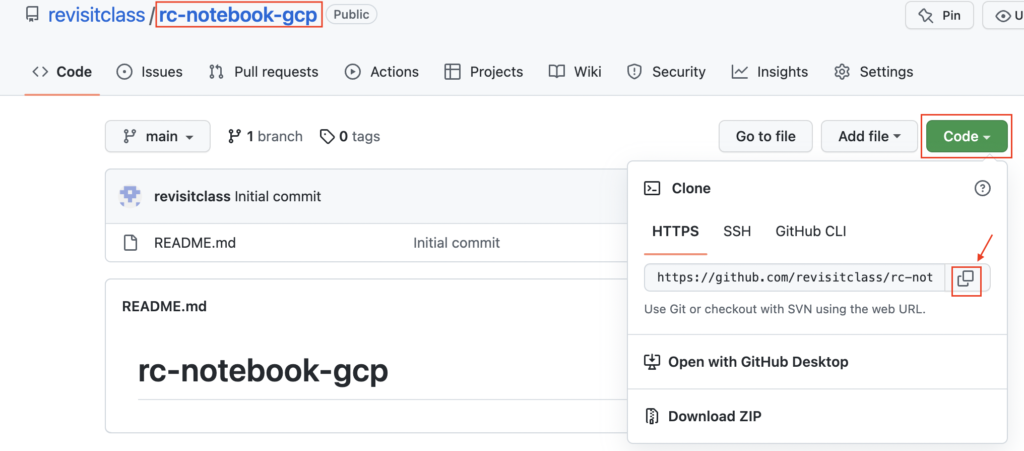
- Copied the Github link to clone this repo in GCP notebook
- In notebook home page, we have clicked the Git icon and provided the Github link to clone the repo.
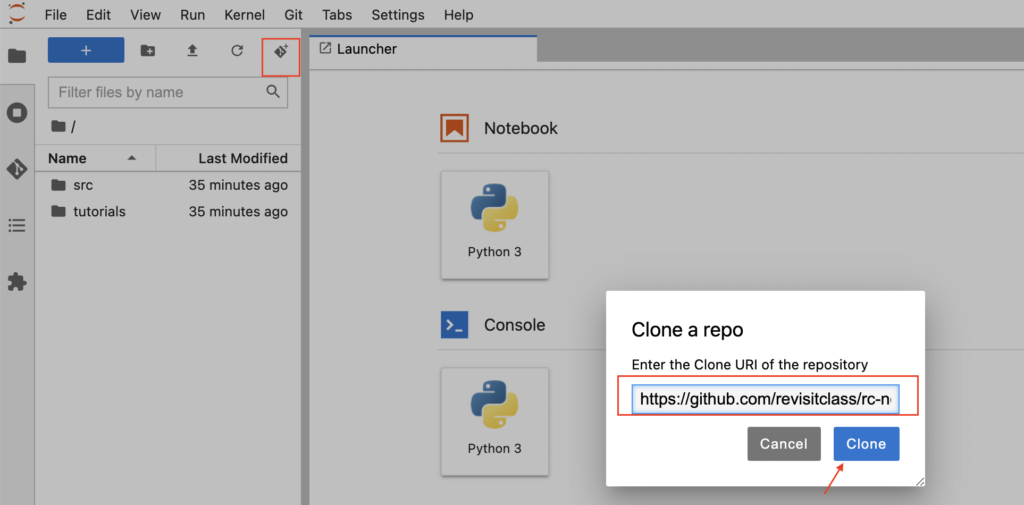
- After clicking the Clone button, we could see our repo name in notebook.

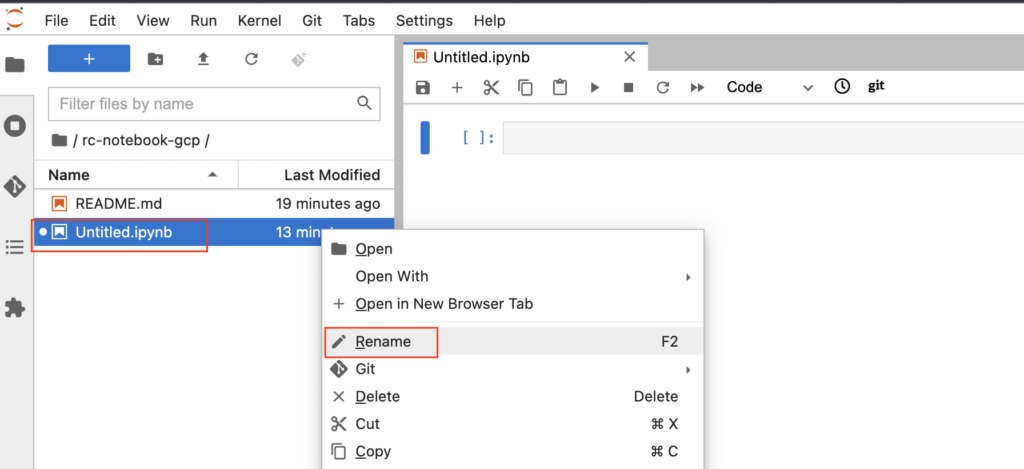
- Now we can go inside the folder rc-notebook-gcp and launch Python3 notebook to start writing the queries.

- Also we renamed the notebook file by right clicking it as below
Run BigQuery in notebook
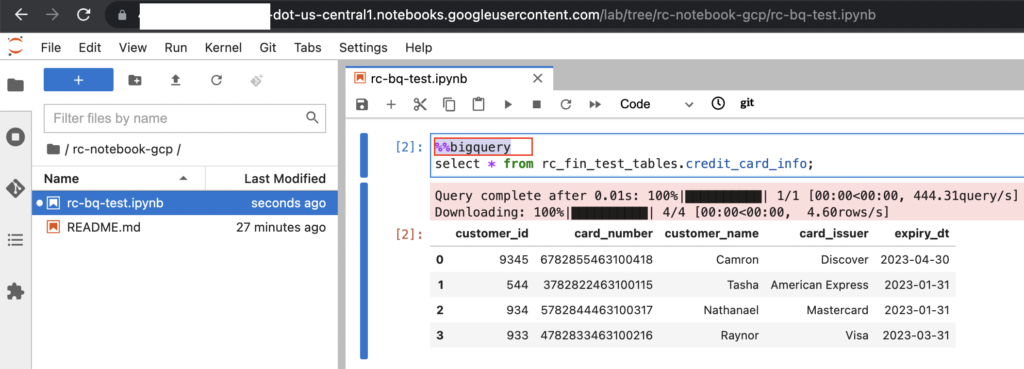
Using BigQuery magics %%bigquery, we can run the BigQuery SQL as below in notebook.
- To save the query results to new pandas dataframe, we need provide the variable name after BigQuery magics
%%bigquery df_card_details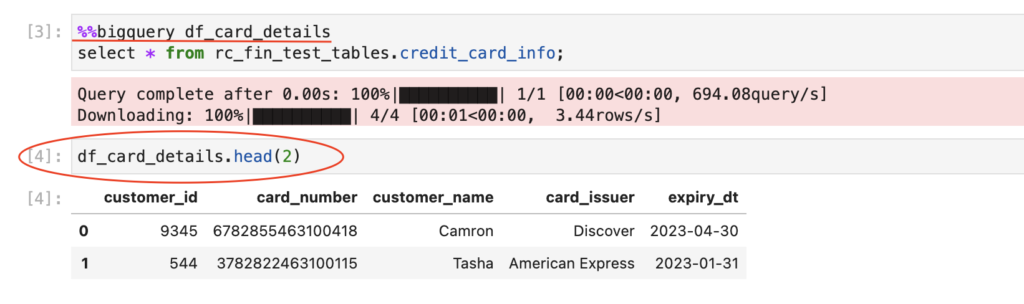
Commit the notebook changes in GCP
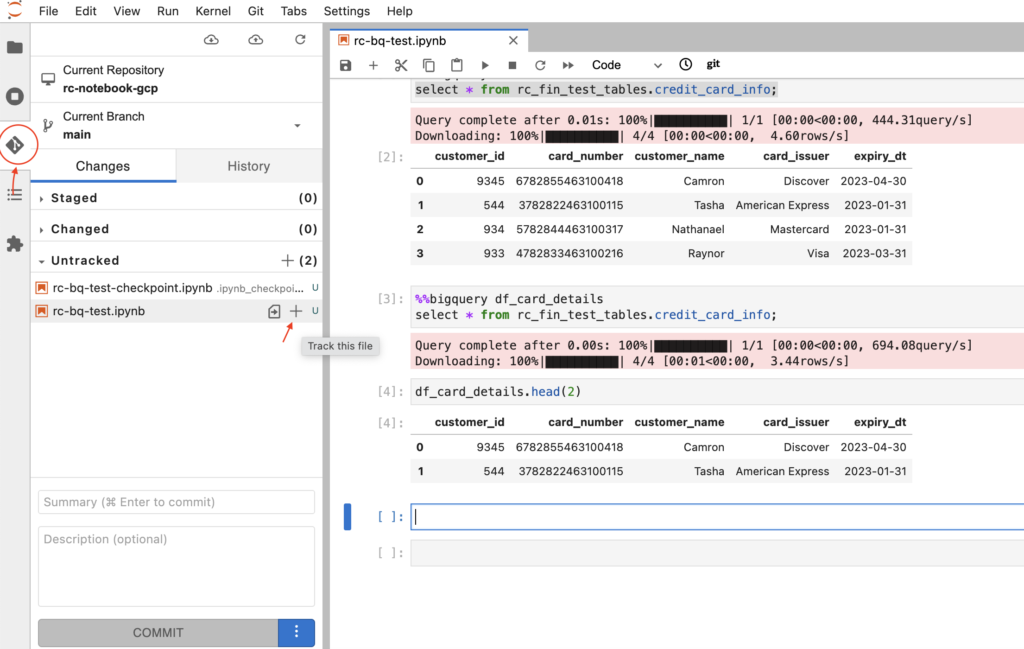
- From the left side of notebook menu, we need to click Git icon as below. It will show the changed files under Untracked category. We have to select the plus (+) sign to move these files to Staged category.
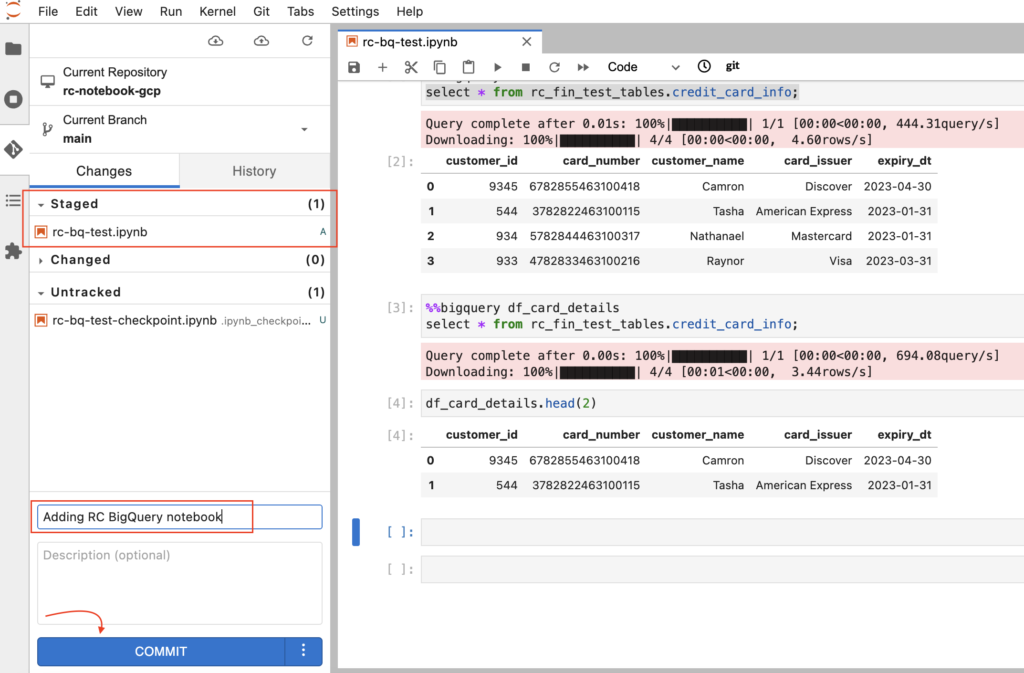
- As shown below, the file moved under Staged category. Then we need to enter comments and click the commit button.
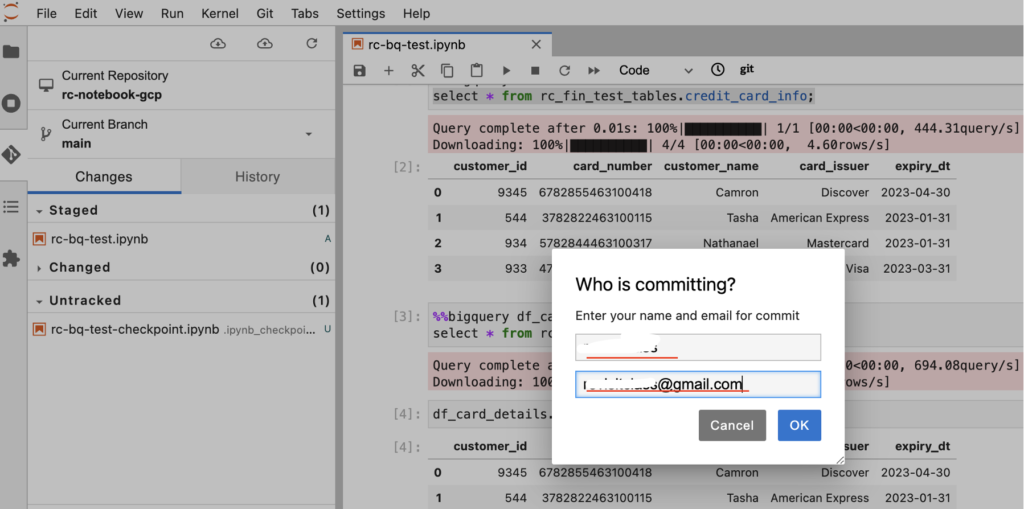
- To commit the changes, we need to provide the Github user name, email id and click Ok.
Push the notebook changes to Github
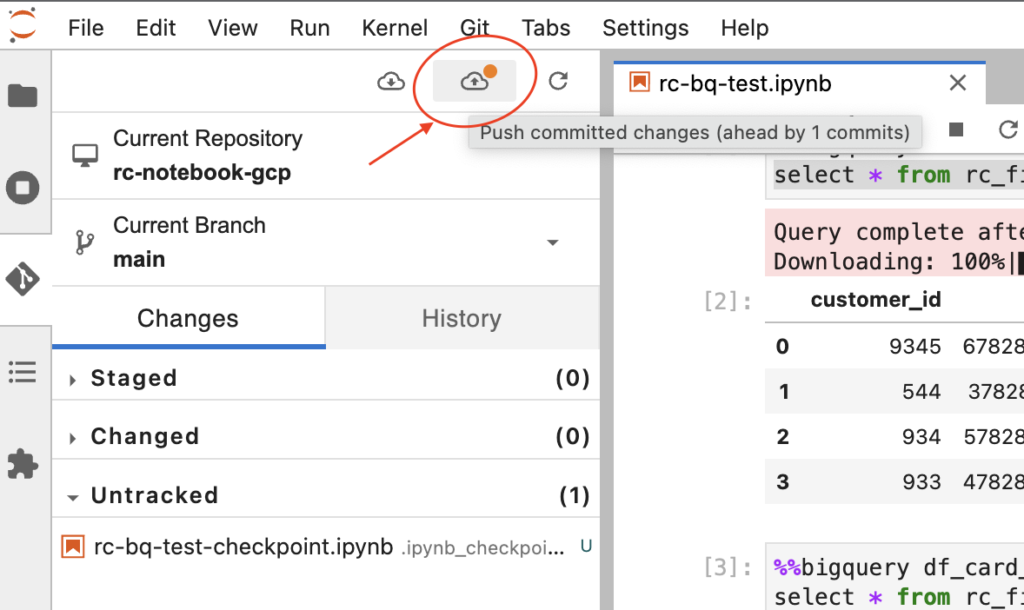
- To push the committed changes, we need to click the upload icon from Git menu.
- Next we need to give the Github credentials/access token and click Ok.

- After pushing the changes, we can see our notebook rc-bq-test.ipynb file in our Github repo.
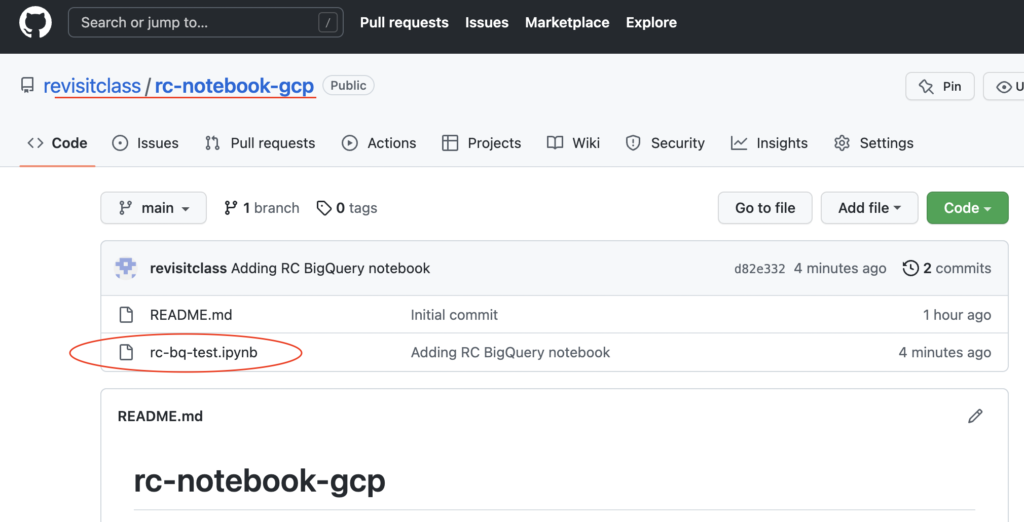
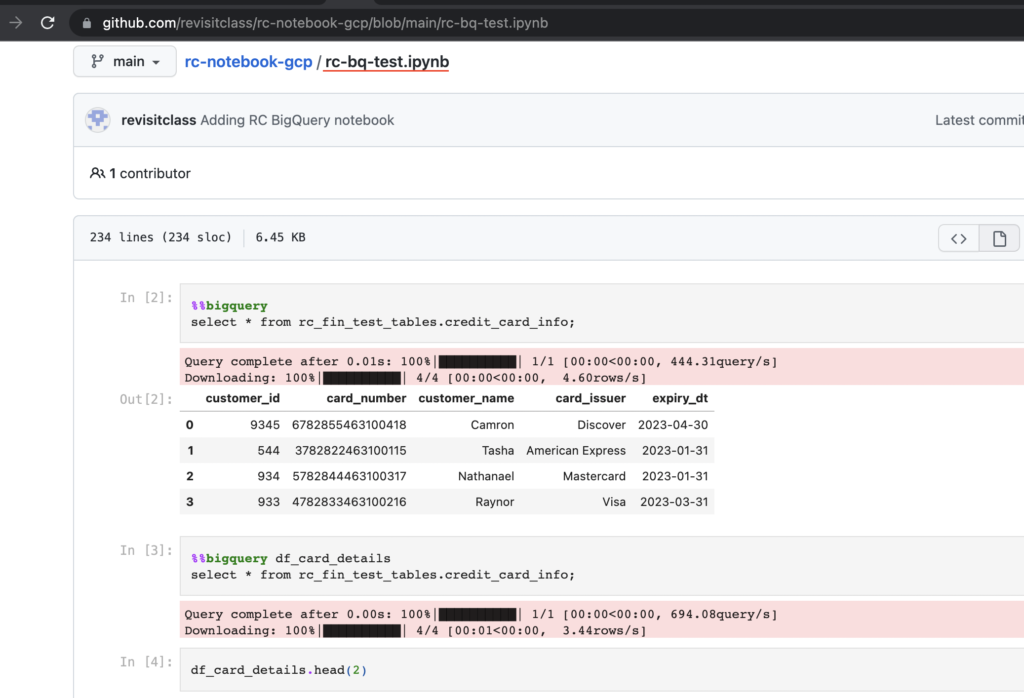
- As shown below, our changes are present in Github.
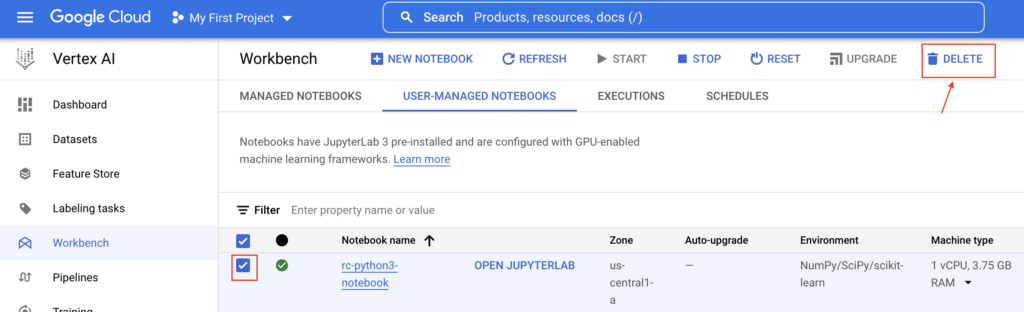
Delete notebook instance in GCP
Once we pushed all our changes to GitHub, we can delete the notebook instance by clicking delete button as below.
Recommended Articles
References from GCP official documentation
- Visualize BigQuery data in Jupyter notebooks
- Create a user-managed notebooks instance
- IPython Magics for BigQuery
Your Suggestions